This summer I had a bunch of projects that required several hours of filming aerial video and photos. I wanted to get the smoothest possible video at an affordable price.
I knew I would use my Panasonic GH3 camera for a lot of the aerial video because it shoots 1080p60 at 50Mbits which would let me do a lot of slow motion.
A lot of great technology has become affordable lately for stabilizing your video camera.
There are two ways to stabilize your camera in a moving car or airplane. One is to use what I would call a robotic stabilizer with motors that counter move your camera to reduce shake.
Basically, if you turn your camera left, the motors will turn right to compensate.
The the gimbal system FreeFly MoVi made a lot of jaws drop when it was announced last year. Many similar and cheaper gyros and gimbals have also come on the market for smaller video cameras.
I plan to either buy or build one of these some day but for the time being I decided to build a more old fashioned stabilizer using spinning gyros.
The spinning gyro stabilizer has been around for years and is commercially made by Kenyon Labs. These are also known as gyros since there is a large spinning gyroscope inside which resists moving because it is spinning so fast. They are expensive but work very well.
I wanted to try building my own version of the spinning gyro for fun.
I found this blog post about using toy gyroscopes to make a DIY camera stabilizer. The gyros are small but they spin at 12,000 rpm so they resist movement pretty good.
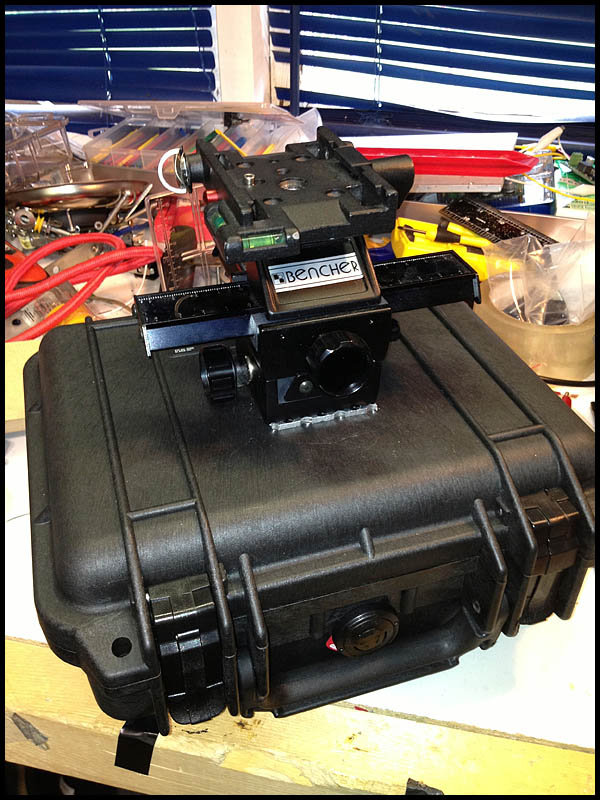
I ordered four of the gyros for about $400 and bought a small Pelican case to hold them and dampen the sound of the motors.
I used aluminum L tubing, tape and a lot of zip ties to hold everything in place.
A cheap 4-way macro slider from eBay would allow me to move the camera forwards, backwards or side to side for balance.
Heavy duty suction cups from Princess Auto allowed me to mount the whole apparatus to the sunroof in my SUV.
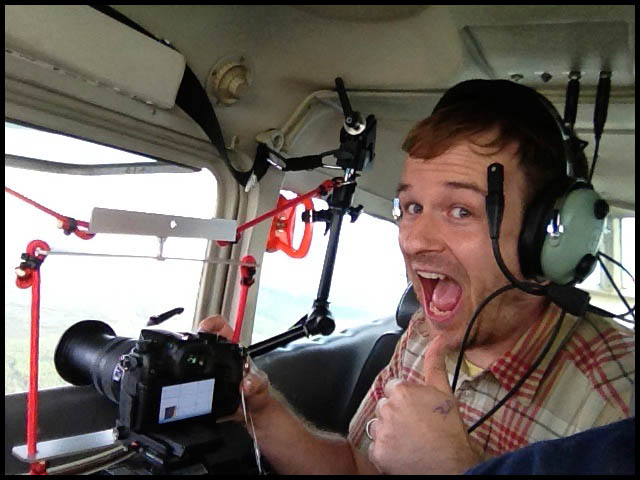
Here I am mounting it in a helicopter to do aerial video for this story
Here I am using it in a truck. It worked really well for stabilizing the camera while driving.
The result?… Since I’ve never used a real commercial motorized or spinning disk gyro I can’t really compare but I would say that the gyros did stabilize my light weight Panasonic GH3 more than if I was just hand holding it.
However for the price ($450+) of building the device, and the hassle of mounting the rig in an airplane I think I would rather rent a Kenyon Labs or Freefly Movi next time. My DIY solution was certainly better than nothing but didn’t make a huge night and day difference like I had hoped. Maybe night and sunrise.
Here you can see the ridiculous way I had to mount the rig in a Cessna airplane. Not super practical.
I also found there were other things that made a bigger difference in the smoothness of aerial footage. One big issue I had with my footage was rolling shutter also known as the “jello effect” when I zoomed in a lot with my GH3 and 14-140 IS kit lens. The footage looked great at wide angles but when I zoomed in a lot, the micro vibrations of the airplane (and probably the gyros too) made the video unwatchable.
Any digital camera with a CMOS sensor will have this problem unfortunately. Way more expensive cameras have global shutters that don’t jello.
Also weather and time of day (heat) will dramatically effect the smoothness of your footage because of turbulence. I flew in small Cessna airplanes for $250/hour but was only able to get a few minutes of rock solid footage. The rest was bumpy garbage. A helicopter costs more than $2000/hour but you can be way more productive and smooth in a helicopter compared to a Cessna.
One last thing. I edit in Final Cut Pro X and although it has a digital video stabilizer filter built-in, there is a way better filter called Lock and Load. For $99 it is worth every penny. Not only does it stabilizer better but it is also way faster at rendering.
Can you tell the difference? About 2/3 of the footage in this video was shot with a Panasonic GH3 on my gyro stabilizer and 1/3 was shot handheld with a Canon 5D Mark-III shooting RAW video and a Zacuto loupe pressed against my face. It was all shot in small Cessna airplanes which are super bumpy and rough to fly in hence wanting the stabilizer.
Watch a time lapse in 360-degree Video ….that’s right…a 360-degree video panorama! Click on the image to the left.
Watch a time lapse of the Murder of Crows sound exhibit being set up at the Art Gallery of Alberta. 98 speakers are set up over a two week period. Time progresses all around you as you click and move your mouse to look all around.Video by Ryan Jackson /Edmonton Journal.
To build make this 360-video I had to build a special rig with three cameras. I used this before for my Indy Panoramas back in the summer. The rig consists of three old Canon 1D d-SLRs with three Peleng 8mm fisheye lenses in a 120-degree offset pattern. The three cameras are wired together to be triggered by an intervalometer. The rig is super heavy and annoying because triple cameras means triple the things to go wrong. If the shutter speed or focus or anything is wrong on one off the cameras then the whole panorama is ruined.
The 1D cameras can only handle 2GB Compact Flash cards which is around 2000 images. I set the intervalometer to trigger the cameras every two minutes which meant I had to change the cards every two days. In total nearly 30,000 images were taken (10,000 per camera).
For post-processing the images, I used Photo Mechanic to organize the images by time taken. I had set the clocks on the cameras to be 1-second apart so when Photo Mechanic sorted the images by time taken, they would go 1st camera, 2nd camera, 3rd, camera, etc.
I then renamed all the images so the files went 0001, 0002, 0003, etc.
I use PTgui to stitch all my panoramas together. It has a great batch process where you can setup a template for your first panorama and then it will auto stitch the rest of the panoramas in file order. This meant that (0001, 0002, 0003)–>Panorama1.jpg , (0004, 0005, 0006)–>Panorama2.jpg
Needless to say this took HOURS and HOURS to process but I just let my laptop chug away overnight for three nights until I had a folder filled with thousands of stitched panoramas.
I then looked through that folder of panos with Photo Mechanic and removed all the boring images where nothing is moving or being installed (ie. at night time, during lunch break, days off, etc).
I then took the folder of usable panorama images and put them into a video using Quicktime Pro’s “open image sequence.”
I set the frame rate to 12fps so that 1606 images would become a 2-min:13-second video.
I then told Quicktime Pro to export the video and I used the Adobe Flash Video Encoder Plug-in to export the video as an .flv Flash video file using On2 compression, 2000×1000 resolution, 12fps, 1200kB/s bitrate. This made about a 20MB video file.
I purchased the panorama player krpano which supports video. I only had to alter a little bit of the .xml code to add a full-screen button and a play/pause/stop button. I plunked the krpano files on a server and embedded it in an iframe in a story page.
The whole project was pretty cool. I hope to use this camera more in the future but as you can see, it is A LOT of work. There are other, far easier methods of doing 360-video but you have to buy expensive cameras and lenses. For this setup I only had to buy a couple more 8mm lenses and use The Journal’s old 1D’s. My rig only shoots stills and you have to make them into a video… for real video check out CNN’s 360-degree video from Haiti. Pretty crazy!
Here are the images of my DIY 360-degree video panorama camera.
Posted by ryanjackson on Sep 24, 2009 in DIY, lighting
I built my DIY Ring Flash back in March by following this YouTube video
I couldn’t find a work lamp as big as his though so I used one that was 2″ smaller. After some testing I found the “ring look” wasn’t quite what I wanted so I started all over will a 15″ stainles steel salad bowl and a 6″-to-7″ air duct spacer. I bought two flexible plastic cutting boards from Le Gnome and cut them for diffuser. Finally I painted the whole thing black to add baddassedness.
The light works great and is powerful with two speedlights pumping into it BUUUTTTT…. it’s soooo heavy! And goofy looking. A kid once litterally asked me if it was a time machine! I think I’m going to eventually buy one of those Ray Flashes but for now I’m happy that this thing cost less than $30 to build.


![DIY_Camera_Gyro_Stabilizer_by_Ryan_Jackson_2013y06m10d13h39m17sss_2013y06m10d13h39m17sss_photo[3]](http://punkoryan.com/wp-content/uploads/2014/01/DIY_Camera_Gyro_Stabilizer_by_Ryan_Jackson_2013y06m10d13h39m17sss_2013y06m10d13h39m17sss_photo3.jpg)
![DIY_Camera_Gyro_Stabilizer_by_Ryan_Jackson_2013y06m13d02h11m00sss_2013y06m13d02h11m00sss_photo[9]](http://punkoryan.com/wp-content/uploads/2014/01/DIY_Camera_Gyro_Stabilizer_by_Ryan_Jackson_2013y06m13d02h11m00sss_2013y06m13d02h11m00sss_photo9.jpg)


